Thursday, February 18, 2021

Brewing a Pilsner in Winter

Last month I brewed a Marzen on MLK Day which I'm calling Martin's Marzen. Yesterday I brewed a lager for the second time. It's a German pilsner based upon the recipe from Randy Mosher's Radical Brewing titled Polka Dot Pilsener, with a few variations. Let me explain.

For one, I split the difference between Mr. Mosher's all-grain recipe and his extract version and put together a partial mash, and instead of a general pale liquid malt extract, I included 3.3 lbs of Briess Pilsen Light LME. Second, I used a variety of high alpha hops known as Magnum. It's a German hops cultivar, so I thought that was good enough, and I didn't have 3-4 oz of Saaz on hand, though I still used Saaz for bittering hops and was lucky enough to have a relatively high alpha acids crop for the variety, walking tall at 6.5% AA (Saaz usually provides about half that). Hallertau Mittelfruh was used for aroma through a hop stand. Third, I repitched a harvested slurry (2nd generation) from dry yeast, Saflager W-34/70 Bohemian Lager Yeast.

 There were no hiccups in my roughly 4-hour brew day. I mashed for an hour and cooled the kettle down in the snow, bringing the beer down to a nice 62 degrees Fahrenheit, and even further by topping off with water from the tap, pitching the yeast at a chilly 52 degrees.

The plan is to leave the beer in the primary for 3-4 days at an ambient temperature of 56, then bring it to the top of the steps for a dicaetyl rest for a few more at room temperature, then return it to the basement floor for another two weeks (3 total). I'll bottle condition the entire 5 gallons, let it sit at room temperature for 2 weeks, then return to the basement, putting a handful of the bottles in the mini fridge to cold condition for a week or two before I try it. Then rest can age comfortably in the cold basement until I'm ready, or they are, one of the two. See the recipe and pictures below:

 Derek's Polka Dot Pilsener - German Pilsner (Pils) (2A)
================================================================================
Batch Size  - 5.25 gallons     
Boil Size   3 gallons         
Boil Time   45.000 min          
Efficiency  70%                 
OG          1.046 sg            
FG          1.009 sg            
ABV         4.9%                
Bitterness  40.0 IBU (Tinseth)  
Color       3.1 srm (Morey)     

Fermentables
================================================================================
Name                         Type     Amount    Mashed  Late  Yield  Color    
Briess - 2 Row Brewers Malt  Grain    5.000 lb  Yes     No    80%    1.8 srm  
Briess LME - Pilsen Light    Extract  3.300 lb  No      No    78%    2.0 srm  
Total grain: 8.300 lb

Hops
================================================================================
Name                   Alpha  Amount    Use    Time        Form    IBU   
Magnum                 12.9%  0.400 oz  Boil   45.000 min  Pellet  17.7  
Saaz (Czech Republic)  6.5%   1.000 oz  Boil   45.000 min  Pellet  22.3  
Hallertau              5.4%   0.500 oz  Aroma  15.000 min  Pellet  0.0   

Yeasts
================================================================================
Name                       Type  Form  Amount    Stage    
Saflager W-34/70 Bohemian  Ale  - Repitched slurry, 2nd generation


Bringing the wort to boil.
The lid is mostly on to retain heat, but slightly off to let steam escape, and with it, dimethyl sulfide or DMS.

Cooling it down in the snow on the deck. Stir, stir, stir!

Cooling it down in the snow in the yard. Stir, stir, stir!

20-30 minutes later and I went from 180 to 62 degrees F.

My beautiful daughter enjoying her time in the snow a week ago.


Time to aerate with a plastic paddle, float a hydrometer, pitch the slurry and put a lid on it!


Wednesday, August 12, 2020

A Surprise Tasting, Vol. 1

There's a six pack in my homebrew basement with yellow caps, but no code. To get to the bottom of this mystery, I tossed one bottle in the fridge a day or two ago to let the yeast drop and the beer to cold condition a little.

 As soon as I popped the cap off this evening I could smell the aroma of malts and thought, "This is my Canadian style ale that I made a few months ago (a prehopped Muntons kit to which I added Willamette and Cascade hops)." It looks like it, too. But there's another batch that I made recently that, due to sheer laziness, I waited a few days after bottling to finally label, and as a result, forgot where all the bottles were. Turns out, after the pour and taking a few sips, this is her: the English bitter. 

The beer is orange-amber, and to my pleasant surprise, the diacetyl I noted in an earlier post has really died down. There's a little bit in the taste, but it's very subtle. I can taste the flinty mineralness that I attribute to the yeast, SafAle US-04, yet it's much more reserved than my last attempt at this style a few years ago. It's a balanced beer, sort of a light amber with a little honey in the aroma. The recipe is Charlie Papazian's Palace Bitter from The Complete Joy of Homebrewing. It's worth noting I pitched the yeast high at around 80-81 degrees F (not recommended), but kept it in the basement in a beverage tub with cool water where it fermented at around 66 degrees F for 5 days. After that, I pulled it out of the tub for a dicaetyl rest at room temperature for about another week. The results aren't half bad.


Thursday, July 30, 2020

Dry-Hopping a Smaller Skunk

Ladies and gentleman, the skunk has left the building! Well, almost. Yesterday I was pleasantly surprised to stick my nose over my primary's breathable bung to discover the aroma of pineapple and tropical fruits. This marked the first time I smelled anything inviting since the beer was skunked as a result of my impulsive and short-sighted fermentation maneuver, when I left my translucent primary bucket in the hot sun to warm up my Kveik yeast.

Skunk, Wildlife, Portrait, Walking, Striped, Black
The skunk is still present, but it's underneath mountains of hops. After taking a reading that showed a gravity of 1.010 (finished!), I tasted the sample. It's exactly what I expect when fermentation goes right: flat, sweet and a silky bitterness. I decided then and there I was going to bottle the brew on the weekend ahead. I had one more step to complete, however.

I took .60 oz of Amarillo hops from the freezer, dropped a hops sock in 1 cup of boiling water in a pot on the stove to sanitize it, tossed the hops in the sock, sprayed it down with Starsan for good measure and walked down my basement where my primary awaited its next addition. I thought it might be possible to just remove the bung, but there was no way to squeeze the hops sock through the little hole, so I pryed off the lid and gently placed the sock in the middle of the brew, wading it through the liquid for a few seconds to immerse the hops. I let go, put the lid back on figured I'd give it about 4 days. I'll be very curious to monitor this batch further until bottling day. Will the dry hops mask more of the skunk? Will fermentation continue to remove the skunk naturally, as what seems to have occurred? I have no scientific data to back up that last assumption, but it definitely smells like the aroma has improved, and at 70-72 degrees F for several days now, the skunk smell went from being the primary aroma to now being only a secondary accent.

Update: It's been a day since I started writing this post, and I'm happy to report that the dry-hopping does appear to have done a lot of good. I'm just judging from outside of the primary, but I don't smell the skunk anymore. I plan to bottle this weekend, so I'll know for sure then. I'm excited to bottle this up and harvest the yeast, slurry and all. I'm working on a cream ale recipe with Cascade hops.

Friday, July 24, 2020

Skunk in the Primary

Sorry to disappoint, but I really don't have a skunk in my primary bucket. If you read my last post, you might recall that I brewed a batch with a Kveik yeast that is accustomed to warm temperatures, but I pitched cooler than I intended to, so I was monitoring the temperature of the beer as it continued into the low 70s F. I even tried warming it up by wrapping it with a mattress pad. Surprisingly (or maybe not so surprisingly for some sharper brewers than myself), the mattress pad did absolutely nothing!

Plan B. I carried the primary outside and kept it at the bottom of the steps outside of our basement, if only for a short while. However, it was actually quite cool as it sits below our deck, enjoying some shade. I then decided to carry it up the stairs and on the walkway next to the house, at the top of the stairs that lead to the basement door. Well, that's where I made a very, very, stupid mistake.

A little context first. I have a Morebeer fermenting bucket, which is awesome because it includes a spigot and on the inside section of the spigot there is a sediment blocker (it's basically a small slit instead of a full circle that the beer passes through when transferring). That said, the bucket (I have two of them) is just barely translucent, which in a normal room allows enough for one to see the hops and wort crud that sticks to the inside of the bucket after active fermentation, as well as the level of the beer. As you can see in the picture below, you can see through to the beer itself in bright enough light. This, naturally, poses a problem when the beer encounters UV rays.

Hops don't like the sun. They react terribly to sunlight and that's why green bottles, which allow more in, are often "skunky." This is also why brands like Pilsner Urquell finally changed from green to brown bottles about 6 years ago. Yuengling apparently thinks it's not a problem or believe people consume Traditional Lager because it's so cool to drink from a green bottle.


So, several hours later, when I was almost done with work, I decided to bring the bucket back inside. It was about 90 degrees F, which again, is within the range of temperature the yeast like. Immediately I smelled burnt rubber. Not good, but it wasn't clear to me what would cause that. At first, I thought maybe the fluctuation in temperature had killed or stressed the yeast. A day later and that aroma changed slightly as the beer had cooled. It was two dimensional: an undertone of rotten eggs, and then I could recall the primary aroma (yes, pun intended); the same aroma I remember from my early 20s when I would hang with friends and drink European lagers...skunk.

Fellow brewers on Homebrewtalk.com suggested I give it a few days and see if the aroma goes away. No one, including myself, believes that skunk aroma is something that will be fermented out in the same way that a compound like diacetyl is eventually cleaned up by the end of the fermentation process. Still, I spent enough on this batch that I might as well treat it like a science experiment, monitor it and see if any changes arise. I'll learn something for sure, and at least I learned something already: don't ever put a translucent bucket in direct sunlight...a sunk will find its way in.

Monday, July 20, 2020

Mirror Pond Pale Ale Clone and Lallemand Voss Kveik Yeast

You might have noticed from recent posts that the last couple batches of homebrew have not turned out too great. One house pale ale tasted infected while another special bitter could complement the popcorn at a movie theater (diacetyl). I've got my theories as to why they turned out so terrible, but more importantly, I've also come up with a solution to this summer heat and the off flavors it contributes to homebrewing, and that's to try a yeast I've been hearing about for some time now. Kveik yeast is said to love warm temperatures, hot even. There are tales of the intrepid homebrewer who will pitch a Kveik yeast (it's a type of yeast with multiple strains) in the mid-90s and onward to 104 degrees F and place their fermenter on their patio or porch to endure the sun's merciless meltdown.

I had had enough. Rather than limiting myself this season to saisons that ferment with yeasts that can tolerate wort temperatures in the mid-to-late 70s F and are accentuated by esters and other byproducts that in other styles are off-putting, I decided to try a Kveik and found a dry yeast version of the Voss strain. For the style, I went with a traditional American pale ale, a clone and a classic named Mirror Pond Pale Ale of Deschutes Brewery from Oregon, which is also said to be one of Bill Murray's favorite beers. The Voss Kveik yeast is said to tolerate a temperature range of 77 degrees F to 104 F, with an optimal temperature range of 95 to 104 F. The question remained, outside of leaving it outside, how to keep it really warm? I jumped on Reddit and discovered some conversation of pitching the yeast in the 90s and letting it ride in a cool basement for the remainder. The theory is that the yeast gets going fast enough, and this is a very high flocculating yeast (a fancy term for it works quick and drops to the bottom) so the exothermic heat keeps the beer well above the ambient room temperature and remains optimal for the first few days, or the days that count the most.

Well, as the saying slips, the best laid plans of mice and men often go awry. I chilled my beer down to around 98 degrees F, which was fine, save for the fact that I added cool top off water (around a gallon). I ended up pitching around 80 F, which is not a problem, except for the fact that I could potentially be at room temperature or 72 F (my basement temp for the last month or so) in 12 hours or less. 6 hours after pitching and I seemed to have dropped a point an hour, which meant I was around 74 F (with math skills to boot), below the temperature range, but still higher than you'd want for a traditional ale yeast like US-05 or Nottingham. Not perfect, but not far off. Another important indicator of something going on is the krausen, and while I wasn't going to pry my breathable stopper from the lid to peek inside, my bucket is translucent, allowing me to clearly see the crusty hops particles and wort proteins sticking to the inside wall, a telltale sign of active fermentation. To help, I moved some bottles out of the way and rested the fermenter on a wood board to get it off the cool concrete floor.

At 11 PM or around 8 hours from the pitching hour, I checked again, rubbing the numbers on my stick on thermometer. It was reading 76, 78, no 80, 82...what? These damn things. Was I wrong earlier, or was it time to go to bed? The outside of the primary definitely felt a little warmer.

At 2:30-3 in the morning I awoke thinking about the bucket of beer. Were the yeast happy? After lying in bed wondering while also trying to fall back asleep, I concluded that if I was ever going to sleep again, I'd have to go down and check on my latest creation. The stick on thermometer was showing two colors: green at 76, and blue at 74, which from what I understand puts the temperature in between at 75 F. Not too bad, and again, warmer than most optimal ale temperatures. To add a little heat, I took a foam mattress pad that has been sitting in my basement in a plastic white garbage bag for a few years (why ask?) and wrapped it around the fermenter as snug as I could, placing a bottling bucket next to it to hold it in place. I'll check later on today, as it's already early morning, to see if the foam made any difference.

Tuesday, July 14, 2020

House Wheat Ale Recipe

There's an entertaining and informative channel on Youtube that for several years has served as a great informal homebrew beginners tutorial. The channel is called CraigTube and the guy who runs it and homebrews lives in Canada. Like the channel, his name is Craig. Watch the homebrew videos (he also does some music recordings and recipes) at any point in his decade plus playlist and you'll discover that his primary motivation for homebrewing is: money. Canada apparently puts a heavy tax on purchasing alcohol, but if you make it yourself it's a hell of a lot cheaper. So Craig makes a lot of prehopped kits from Coopers. Over the past few years, in fact, he's pretty much settled on the Coopers IPA kit, which has become kind of boring to hear about, but his past videos cover a lot of different styles of beer, and you get to watch a basic brewer go from prehopped kits to partial mash and all-grain, and from using the yeast that comes with the kits to reharvesting an expensive liquid yeast over and over again and storing it in a pickle jar. One of my favorite videos is the S.S. Minnow Mild Ale.

Craig also interviewed John Palmer a few years back, the author of one of the most popular homebrewing books, How to Brew. The interview focuses predictably on method, tips and and technique, but the host also asks a lot of questions that appear to aim to invoke a defense of all-extract homebrewing by Mr. Palmer. Not only does he oblige, but Mr. Palmer discusses an all-extract wheat ale recipe that he often makes.

The talk inspired me to try my hand at formulating a simple wheat ale recipe. I did some research on the style, consulted Brew Your Own magazine, which really emphasized sticking to a bitterness-to-starting gravity ratio between 0.3 and 0.7 (my recipe landed on 0.48), kept within the BJCP guidelines and came up with the following:

Wheat Ale - American Wheat or Rye Beer (6D)
================================================================================
Batch Size  2.75 gal   
Boil Size   2.5 gal         
Boil Time   60 min        
Efficiency  70%                
OG          1.043 sg           
FG          1.011 sg           
ABV         4.3%               
Bitterness  20.8 IBU (Tinseth) 
Color       3.6 srm (Morey)    

Fermentables
================================================================================
Name                       Type     Amount    Mashed  Late  Yield  Color   
Brewer's Best - Wheat LME  Extract  2.300 lb  No      Yes   78%    3.0 srm 
Brewer's Best - Wheat LME  Extract  1.000 lb  No      No    78%    3.0 srm 
Total grain: 3.300 lb

Hops
================================================================================
Name                   Alpha  Amount    Use    Time        Form    IBU  
Nugget                 13.4%  0.212 oz  Boil   1.000 hr    Pellet  20.8 
Saaz (Czech Republic)  4.5%   0.500 oz  Aroma  15.000 min  Pellet  0.0  

Yeasts
================================================================================
Name                     Type  Form  Amount    Stage   
Muntons (prehopped kit)  Ale   Dry   1.42 tsp  Primary 

Notes
================================================================================
The Centennial hops should be added for a 15 min whirlpool once the wort cools to 170.

Tried on 7/3/20 - very good aroma of wheat, floral hops and yeast. Almost smells like a hefeweizen, but not nearly as strong. The taste is very balanced, medium-bodied and thirst quenching. Very pleased with this brew.

If you like wheat beers, give this one a try. If you've never tried a wheat beer, also, give this one a try. It's a thirst quencher for sure!

 Clearly darker than 3 SRM, but when it tastes this good, who gives a damn!


Thursday, July 9, 2020

Diacetyl in the Palace Bitter

This evening I bottled 3.25 gallons of the Palace Bitter I brewed almost two weeks ago. I had taken a hydrometer reading after a week of the beer sitting in a primary bucket, and I noticed a fairly sharp Chardonnay, Pinot Grigio or buttery smell, otherwise known as diacetyl.

I'm not exactly sure what to attribute the smell to; that is, what caused it to be so plentiful. It naturally occurs in fermentation, the science of which I'm no expert on, but I do know that the yeast also ends up cleaning it up at the end of the fermentation. I did what's called a diacetyl rest since Sunday where I let the beer warm up a few degrees (I did a little more than a few) to help the yeast get moving on cleaning up the butter.

Well, some 25 bottles later, and an hour and a half of sanitizing and bottling, then another 20 minutes cleaning up my primary bucket and every piece of equipment, and I finally got to trying the hydrometer sample of beer again. I didn't think it tasted any different than it did on Saturday or Sunday, whichever day it was that I tried it first.

Could it be that I should have let the beer sit another week or two? Maybe so. But I also wonder if there's something else that caused the very pronounced diacetyl flavor. I did pitch the yeast higher than normal (81 degrees F), but I have never read that that would be associated with diacetyl. Other byproducts of fermentation, sure, but diacetyl, not from my understanding.

If you have experience with this off flavor, leave a comment below and let us know about it.

Tuesday, July 7, 2020

A Homebrew Clone of Hyland's Pale Ale and a Sugar Problem

Back in April of this year I brewed a clone recipe of Hyland's Pale Ale that was published in North American Clone Brews by Scott R. Russell. It was a big step for me because it was my first partial mash, using some 2-row to add to the malt body and aroma. After a few weeks in the primary and a couple weeks for bottle conditioning, I tried one out. The aroma was nice, with some malt sweetness and a bit of floral hops. I could really taste the difference in the malt flavor. It was a balanced brew with just enough hops to keep it in pale ale territory, but not a hop bomb or a pale ale that looked like a pilsner (nothing wrong with light colored pale ales as I think Yards' Philadelphia Pale Ale is one of the best around). There was just one problem: it was barely carbonated.

I had batch primed with dissolved table sugar, so it's not as if I missed a step or didn't add enough. I used Brewers Friend's priming calculator to add around 2.5 volumes of CO2. The only thing I could think of after those first 2 weeks: it needed more time.

Well, hell a month later and I wasn't see the results I wanted. It tasted finished and the malt quality was something to be proud of, but it needed more fizz. It's pretty clear to me now, some three months from the brew day, that it's a matter of the conditioning sugar not being consistently diffused throughout the batch. I poured from a 22-oz bottle this evening that's been in the fridge for a few weeks and I got great carbonation. Take a look and see (this is a minute or two after the pour):
  

The most obvious solution to this problem is the following: stir the batch (lightly so you don't introduce excess oxygen) after it's transferred from the primary to the bottling bucket. Apparently there's just not enough movement or force to get that sugar diffused throughout the batch when all one does is let their beer slide out of tubing and fill from the bottom of the bucket to mix with the sugar solution that awaits the good stuff. Of course, there are exceptions. Sometimes I get consistent conditioning, and in other cases, like this one, I don't.

In a few days, I'm bottling the English bitter I made over a week ago. I'm going to break with convention and gently stir my sugar solution into the primary, carefully, so as not to stir up any of the trub. Once I do that--figuring I'll stir for a good 10 or 20 seconds--I'll throw the lid back on and get to washing a few dozen bottles while the sugar diffuses. I got some new German looking 500 ml bottles I'm dying to try out.


Tuesday, June 30, 2020

Crushing with the Corona and a "Palace Bitter"

The famous beer writer Randy Mosher once wrote in his book Radical Brewing that "There are magicians who can coax well-milled malt from a Corona-style mill, but they are rare." Well call me a magician, Mr. Mosher. There's nothing wrong with these babies, and there's something about hand cranking that feels more fitting for this labor of love known as homebrewing. Drills are fast, and it makes sense to use them, especially at a homebrew shop or when you're whipping up a 10 pounds-plus all-grain batch, but when I'm only milling a couple pounds at a time at best, I've got a crush on a Corona mill.


It takes a few tries to find the right setting with these mills. After all, they're made for milling grains into flour. Tighten the knob too much and you've got the ingredients to make bread. But if you'll twist it back just a little bit, crank a few times and inspect your work, you're on the right path. My rule is so simple it's stupid: if your milled grains look very similar to whole grains, you don't have the right crush (like the picture below).


 If they look very different from whole grains, but not a floury mess, you've found it. I'm about to get real unscientific here, but notice the hard white pieces of the grain in the picture below this paragraph. There's a lot more in this crush than the one before. That to me is a good sign that I've done it right and the grain will yield high efficiency.


For a 3.25 gallon batch, I milled 4 ounces of 2-Row and 8 ounces of Crystal 60. The rest of my fermentables came from liquid extract. I took a Charlie Papazian recipe from The Complete Joy of Homebrewing (3rd Edition) called "Palace Bitter" and modified it as a 30 minute boil, partial-mash recipe with a few adjustments to the hop schedule using BrewTarget. For the yeast, I used a popular English strain, US-04. Here's a look at the recipe:

Palace Bitter - Special/Best/Premium Bitter (8B)
================================================================================
Batch Size  3.25 gal
Boil Size   2.5 gal
Boil Time   30.000 min         
Efficiency  70%                
OG          1.042 sg           
FG          1.011 sg           
ABV         4.2%               
Bitterness  26.8 IBU (Tinseth) 
Color       9.8 srm (Morey)    

Fermentables
================================================================================
Name                         Type     Amount    Mashed  Late  Yield  Color    
Briess - Pale Ale (LME)      Extract  2.300 lb  No      No    78%    6.0 srm  
Briess - Pale Ale (LME)      Extract  1.000 lb  No      No    78%    6.0 srm  
Caramel/Crystal Malt - 60L   Grain    8.000 oz  Yes     No    74%    60.0 srm 
Briess - 2 Row Brewers Malt  Grain    4.000 oz  Yes     No    80%    1.8 srm  
Total grain: 4.050 lb

Hops
================================================================================
Name           Alpha  Amount    Use   Time        Form    IBU 
Fuggles        4.7%   0.400 oz  Boil  30.000 min  Pellet  9.1 
Kent Goldings  4.7%   0.400 oz  Boil  30.000 min  Pellet  9.1 
Fuggles        4.7%   0.250 oz  Boil  15.000 min  Pellet  3.7 
Kent Goldings  4.7%   0.250 oz  Boil  15.000 min  Pellet  4.3 
Kent Goldings  4.7%   0.300 oz  Boil  2.000 min   Pellet  0.7 

Yeasts
================================================================================
Name         Type  Form  Amount   Stage   
Safale S-04  Ale   Dry   0.39 oz  Primary 

Notes
================================================================================
Joy of Homebrewing (3rd edition) by Charlie Papazian.

I'm doing a 30 minute mash (with the addition of 2-row) and a 30 minute boil.

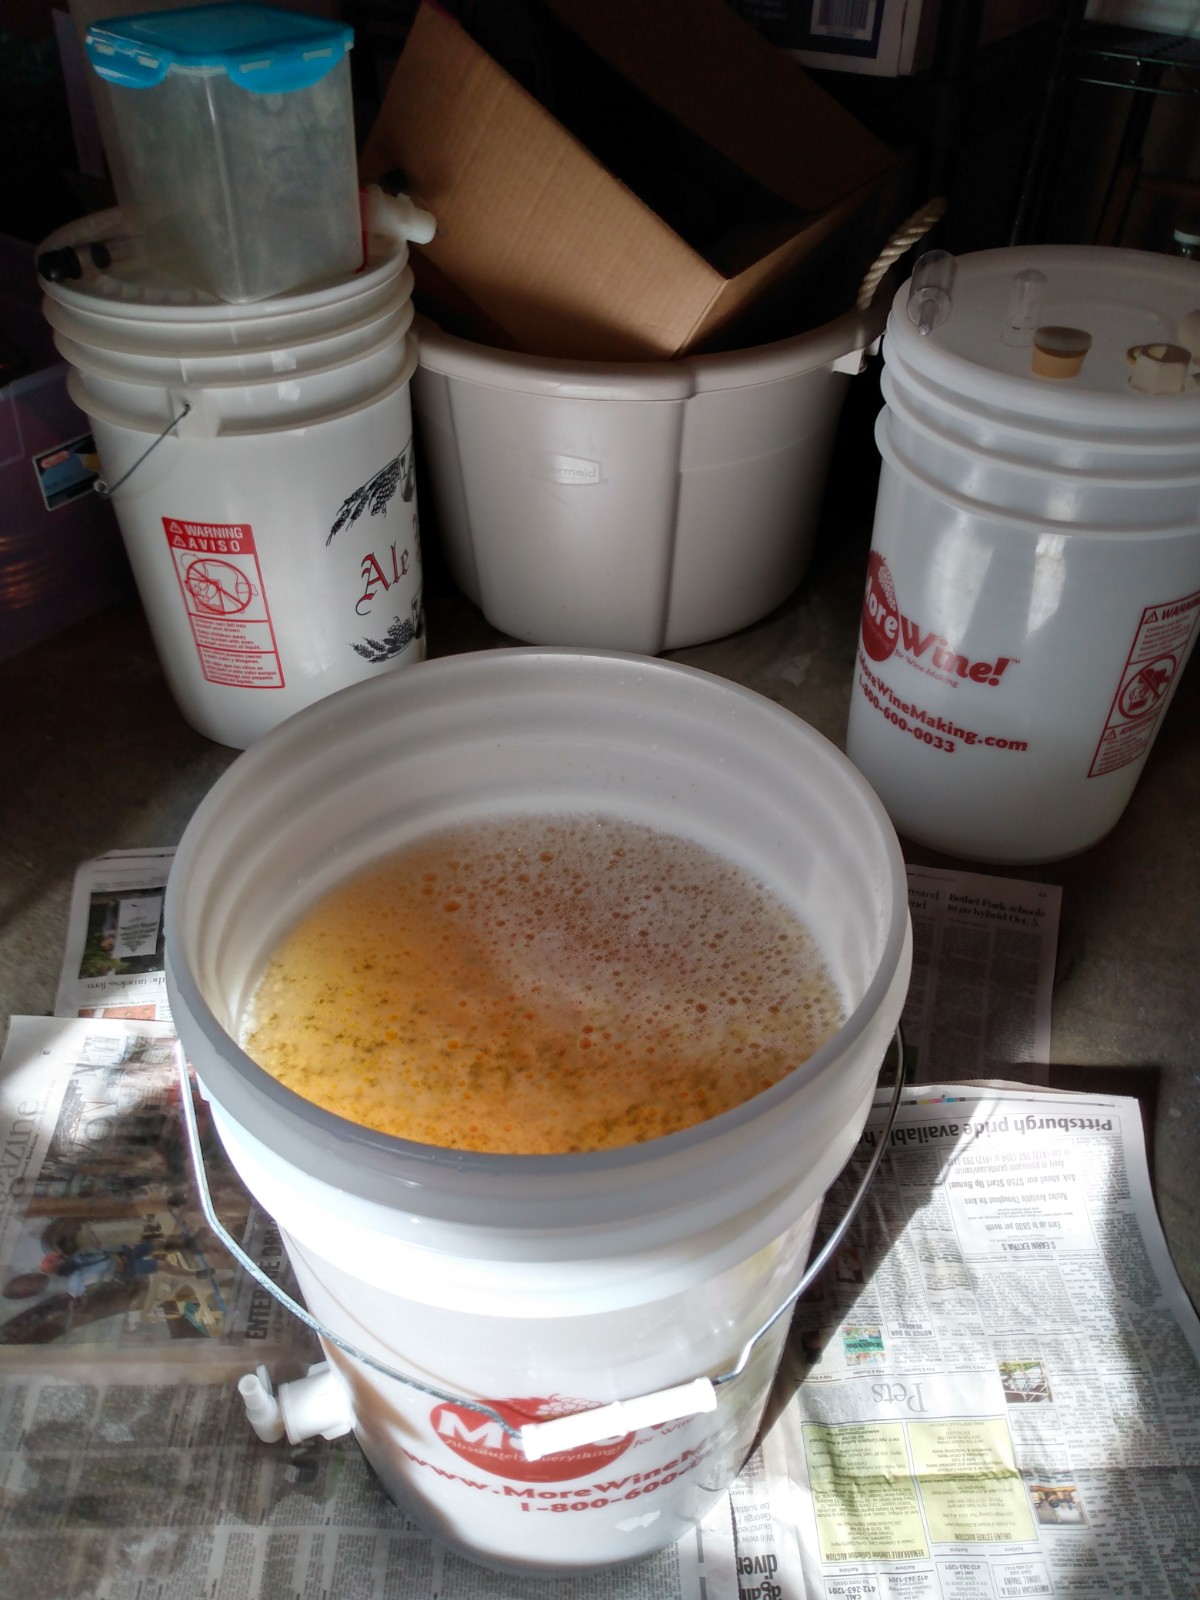
My plan is to let this sit in the primary bucket for 10-14 days, bottle and prime for another 2 weeks. I'm expecting an amber colored beer that's balanced and very sessionable. Given all the science-based skepticism of late hopping in favor of whirlpool hopping (below 180 degrees F) that I've been reading lately, I'm curious as to just how much aroma I'm going to get from this brew, but only time will tell a lie. I'll post a picture or two of the brew in a glass when it's ready.

Wednesday, June 24, 2020

Brewing in the Summer - Experiment Plans

I've been planning my next brew for the past few weeks, originally thirsting for a a mild ale, but eventually deciding upon an English bitter. Naturally, there are a few risks to brewing either (if not most styles) during summer months. It's just too damn hot and my basement can get as high as 74 degrees F in July. On average, though, my basement is between 70-72 degrees F during the summer, which doesn't sound all that bad until you discover that the fermentation process is exothermic, which is a fancy way of saying the yeast in your homebrew generates its own heat, with some estimates as high as 7-8 degrees F. In other words, my yeast won't be happy at 80 degrees F. That's warmer than my parents pool right now!

One solution is a makeshift swamp cooler. Basically, put your fermenter in a beverage tub, put some cold water in the tub and drape a thin towel or t-shirt over the fermenter after soaking it and let a fan blow its way. As the water evaporates, the air gets cooler. I tried this last year and while it definitely worked, my shirt had mold spores on it after several days which worried me about them transferring somehow to the beer, so I won't be doing that this summer.

I'm not buying a fridge and I don't have a temperature controller, so those solutions are out also. So, the one solution left that I've read about we'll call fermenter immersion. Simply put: use the same beverage tub, and in one order or another, fill the tub up to the point that it reaches the level of beer in your fermenter. Check the temperature. If you're brewing an ale and the temperature of the tub's water is in the low to mid 60s, that's perfect. Check it everyday and try to keep a stable temperature (within 10 degrees of fluctuation I'd assume) for 5 days, then pull it out and let it ferment out for another 9 or 10 days.

There are a few caveats to this method. One, put some sanitizer or cleaner in the tub to keep some of the nasties at bay. Second, when you pull out to warm it up, don't let it warm beyond the yeast's temperature range. I wouldn't worry about exothermic heat, as mentioned above, as much as I would during the first few days of fermentation, but you should put the fermenter back in the cold tub if temperatures get above 70 degrees F, and given how hot it's been lately, I'm likely going to need to.

I'll post pictures and updates on this blog in a few days. Leave your comments below about your own summer brewing methods and madness. Cheers!

Sunday, June 21, 2020

My House Pale Ale...Gone Bad?

If I've not mentioned it on this blog before, I'm a homebrewer. I've brewed for the better part of 12 years, with a short hiatus between 2014-16 when I lived in Virginia and never made the time. Most of my early brewing years were spent making my own recipes, rather than starting with the basics and starting with idiot-proof, tried and true recipes. Most were also probably not that good, though that was before I learned of the concept of 'green beer', or the simple truth that it takes a while for your bottle conditioned homebrew to condition.

I've since become a better brewer, utilizing excellent homebrewing books like North American Clone Brews by Scott R. Russell. But recently, I decided to try developing my own recipes again, and I believe I've gotten to the point where I can do so without any ill effects. I understand how to keep ingredients within a style's range. I use Brewtarget to calculate everything, and really love the open-source program, and can't justify paying for something like BeerSmith (love Brad Smith's articles, however).

Here's a pale ale recipe I created recently that I figure could be my house pale ale:

House Pale Ale - American Pale Ale (10A)
================================================================================
Batch Size 2 gal
Boil Size   1.5 gal
Boil Time   60.000 s            
Efficiency  70%                
OG          1.047 sg           
FG          1.012 sg           
ABV         4.7%               
Bitterness  35.2 IBU (Tinseth) 
Color       5.2 srm (Morey)    

Fermentables
================================================================================
Name                         Type         Amount    Mashed  Late  Yield  Color    
Muntons DME - Extra Light    Dry Extract  1.600 lb  No      No    95%    3.0 srm  
Briess - 2 Row Brewers Malt  Grain        9.600 oz  Yes     No    80%    1.8 srm  
Caramel/Crystal Malt - 20L   Grain        4.800 oz  No      No    75%    20.0 srm 
Briess - Wheat Malt, White   Grain        2.400 oz  Yes     No    85%    2.5 srm  
Total grain: 2.650 lb

Hops
================================================================================
Name      Alpha  Amount    Use      Time        Form    IBU  
Cascade   6.0%   0.600 oz  Boil     1.000 hr    Pellet  35.2 
Amarillo  9.5%   0.200 oz  Aroma    15.000 min  Pellet  0.0  
Amarillo  9.5%   0.200 oz  Dry Hop  5.000 day   Pellet  0.0  

Yeasts
================================================================================
Name         Type                            Form   Amount     Stage   
Muntons - prehopped kit yeast Ale   Dry   7 grams - primary


I fermented in a Mr. Beer plastic barrel fermenter using left over yeast from a Muntons prehopped kit. I cooled naturally, as I still don't have a wort chiller. I've done so many times before without any bacterial infections. I usually either cool in the plastic fermenter (I cool it to below 160 F first, then pour it in the fermenter with cold water awaiting) or in the kettle with the lid on. I always pitch the yeast in these situations about 12 hours later.

Skip ahead 2 weeks later and the beer strangely smells like a hefeweizen or wheat beer with that phenolic, band-aidy aroma. I tasted my hydrometer sample and got a big smack of iron or blood flavor, like when you're out of shape and playing backyard football in the winter time; that burn that hits your throat. I've read it really could be a metallic flavor that could have come off of the kettle itself or my metal spoon, but of course, maybe I'm tasting a bacterial infection. Third guess would be that I'm just tasting the worst sample I could as it's literally the first bit of beer to come out of the barrel and through the sanitized spigot, which likely has loads of yeast. Here's to hoping 2 weeks brings me a pleasant surprise. I welcome your comments, thoughts and experiences below.

Friday, February 7, 2020

Dogfish Head Bitches Brew

2/7/20

A 1 pint, 9.4 fl oz champagne style bottle, gifted to me by my brother-in-law on Christmas 2016! I put off drinking this year after year, winter after winter, and it went from one fridge to another. My hesitancy was due to my reluctance to commit to a 9% beer that amounts to over 2 high gravity brews, but I guess that's a part of the experience. As much as I now enjoy low gravity beer, it's a good thing to indulge in this type every now and then.

As for the experience: big chewy malt in the nose. Raisins, currants and almond milk. Dark nougat head with a pitch black body as expected. A little boozy up front, then spicy hops and bread crust with a dark, dry, malty finish. Heavier body, but fits the style. Sipping on this one!

As I sip, and as it warms, it's a deeply intense, chocolate and port-wine-flavored beer.

It's fitting.

Today marked the first real snow day of 2020 in southwestern Pennsylvania. I dragged my daughter on a sled through the snow a half dozen times, up and down our backyard slope, racing through the cold air in heavy boots, and this is just type of delicious and intoxicating unwinding I needed.

This one brought me back a decade in terms of the experience of searching out the aromas, flavors and feel. I can almost see myself in my brown recliner, stretching out with something special after an evening visit to Guntown Beer. I swear I smell a little Shelter Pale Ale in here. Well done Dogfish!


Thursday, March 20, 2014

St. Stefanus Blonde

Notes from 3/8/14

On the bottle: Cellar release 4-2012

It states on the bottle that the brew is not released from a cellar until it's matured for 3 months, putting this beer at about 26 months old (more aging than the brewery suggests, but how bad could it really be?).

A lively yellow-golden appearance with an incredibly active flow of carbonation bubbles, which doesn't let up even after several minutes. Egg white head. Spice in the nose. Lemon, yeast, grass, banana and pineapple. The aroma is complex.

Spicy with an underlying sweetness in the taste: black pepper, cinnamon and ginger-like flavors. The hop bite and bitterness is toned down overall, which is undoubtedly due to the extended aging. As good as this beer is, I probably should have opened it before the year ended.

As it warms, a pronounced yeast flavor and aroma is steering my senses toward the hefeweizen style. A light-medium bodied beer with complex flavors and aromas. At 7% ABV, a sipper that's strikingly drinkable and highly recommended!

Thanks to my friend, Ricky, for the Belgian beer.

Note: the bottle was signed by the brewmaster; the signature looks like Jef Versele.